Want to create a reusable Angular 2 component which can be customized with a user-provided template?
I had this use case and could not find any relevant documentation or tutorials, so after a few days digging around the internals on Angular 2, I am sharing the result of my research. This is one way to do this - perhaps there are other, better ways. Feedback is welcome!
(TL;DR - working demo on Plunker)
UPDATE: 27/02/16 - A few hours after I posted this, inveterate experimenter Ben Nadel posted a follow-up where he provides a simplified way to implement custom templates: Providing Custom View Templates For Components In Angular 2 Beta 6
UPDATE: 15/05/16 - Some of the APIs discussed in this post have changed in the recent releases of Angular 2. Therefore this code may not work as-is on recent versions, but the concept should still apply.
Goal - SimpleTimer
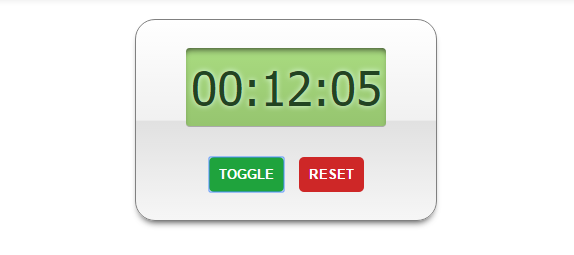
Our finished timer component
We are going to take a simple example: we want to build a timer which has a start/stop and a reset button. We want our SimpleTimer to encapsulate all the logic of incrementing and resetting the timer, but allow the consumer of the component to specify her own template.
Here is what our SimpleTimer logic looks like:
export class SimpleTimer {

  running: boolean = false;
  time: number = 0;

  getTime() {
    let pad = n => n <= 9 ? '0' + n : n;
    let cs = Math.floor(this.time % 100);
    let s = Math.floor((this.time / 100) % 60);
    let m = Math.floor(this.time / 6000)
    return `${pad(m)}:${pad(s)}:${pad(cs)}`;
  }

  toggle() {
    this.running = !this.running;
    if (this.running) {
      this.tick();
    }
  }

  reset() {
    this.time = 0;
  }

  tick = () => {
    this.time += 1;
    if (this.running) {
      setTimeout(this.tick, 10);
    }
  };
}
How Not To Do It
In Angular 1.x, we are able to specify a function as the templateUrl, which has access to the element, attributes and any injectables we like. This gives us a number of ways to inject custom templates (example).
In Angular 2, on the other hand, templates and templateUrls are specified via decorators and are parsed before the component life cycle even begins. This means they have no access to injectables. My first efforts involved code like this:
@Component({
  selector: 'simple-timer',
  // fails - this code is not within the scope of the class
  template: () => this.timerService.getTemplate()
})
export class SimpleTimer {

  constructor(private timerService: TimerService) {}
  // ...
}
… and other similarly ineffective variations of this approach. With plans to turn template compilation into a build step, it actually makes sense that run-time changes to a component’s template will no longer work like this. So how can we do it then?
NgFor and Template Directives
My hours of fruitless tinkering eventually brought me to realize that the built-in NgFor directive does just what I want to do - it takes a user-specified template and even provides some local variables to that template - index, last, even & odd. So let us delve into how it achieves this magical feat.
First of all, from the NgFor docs, we can see that * syntax is sugar for the actual template markup:
- We usually write:
`<li *ngFor="#item of items; #i = index">...</li>`
- which is de-sugared first to:
`<li template="ngFor #item of items; #i = index">...</li>`
- and finally to:
`<template ngFor #item [ngForOf]="items" #i="index"><li>...</li></template>`
Let’s work with the de-sugared version to start with. If we look at the NgFor source, we see that it makes use of something called TemplateRef, which according to the docs “Represents an Embedded Template that can be used to instantiate Embedded Views.” Sounds good - let’s start coding our SimpleTimer.
Defining the Template
Let’s assume we have imported the directive SimpleTimer and want to use it in our app like this:
<template simpleTimer>
  <div class="time"><!-- show time here --></div>
  <div class="controls">
    <button>Toggle</button>
    <button>Reset</button>
  </div>
</template>
We can get a reference to this template now simply by injecting TemplateRef into our constructor. We will also inject a ViewContainerRef, since we’ll need this to embed the template into the view. Then once the directive has initialized, we can “stamp out” the template into the view:
constructor(private templateRef: TemplateRef,
            private viewContainer: ViewContainerRef) {}

ngAfterViewInit() {
  this.viewContainer.createEmbeddedView(this.templateRef);
}
So we’ve got our template working, we’re half way there! Now the problem of giving our template access to the properties of our SimpleTimer class.
Providing Local Variables
In order for our template to be useful, we need access to the methods getTime(), toggle() and tick(). Looking through the NgFor source, I saw they use the setLocal() method of an EmbeddedViewRef, which in turn is what we get back from createEmbeddedView() above.
We can provide the three members of our “API” as an object like this:
<template simpleTimer #timer="timerApi">...</template>
ngAfterViewInit() {
  let view = this.viewContainer.createEmbeddedView(this.templateRef);
  let api = {
    toggle: () => this.toggle(),
    reset: () => this.reset(),
    getTime: () => this.getTime()
  }
  view.setLocal('timerApi', api);
}
This then allows us to hook up our template to the methods we need.
<template simpleTimer #timer="timerApi">
  <div class="time">{{ timer.getTime() }}</div>
  <div class="controls">
    <button (click)="timer.toggle()">Toggle</button>
    <button (click)="timer.reset()">Reset</button>
  </div>
</template>
Note that in the code above - #timer="timerApi" - #timer could be named anything we like, but timerApi must match the name used by the setLocal() call.
Fixing Change Detection Errors
So far we can specify our own template, and bind local variables to it. So are we done? Not quite yet. Running our code with the changes made so far, the first thing we’ll notice is a big fat exception in the console:
EXCEPTION: Expression '{{ timer.getTime() }} in App@3:20' has changed after it was checked. Previous value: '[object Object]'. Current value: '00:00:00' in [{{ timer.getTime() }} in App@3:20]
From what I understand, this is caused by the fact that our binding {{ timer.getTime() }} is being checked once before we provide the local API value, and then once again after the API is defined, which gives the new (correct) value. Luckily, Angular 2 allows us to manipulate the change detection on a per-component basis, giving us the control we need to mitigate this issue. We will inject a ChangeDetectorRef into our constructor so that we can temporarily disable change detection until our local API variable is properly hooked up:
constructor(private templateRef: TemplateRef,
              private viewContainer: ViewContainerRef,
              private cdr: ChangeDetectorRef) {}

ngOnInit() {
  // we need to detach the change detector initially, to prevent a
  // "changed after checked" error.
  this.cdr.detach();
}

ngAfterViewInit() {
  // ...
  view.setLocal('timerApi', api);
  setTimeout(() => this.cdr.reattach());
}
In the code above, we detach the change detector when the directive initializes, and then re-attach it only after the local API has been provided. The setTimeout() seemed to be necessary so that the change detector only gets switched back on during the next tick of the event loop.
Final Result (With Added Sugar)
As mentioned in the NgFor example, Angular 2 provides some syntactic sugar with the * character, which makes the template syntax a little cleaner. With this addition, here is the final code:
<div *simpleTimer="#timer=timerApi">
  <div class="time">{{ timer.getTime() }}</div>
  <div class="controls">
    <button (click)="timer.toggle()">Toggle</button>
    <button (click)="timer.reset()">Reset</button>
  </div>
</div>
@Directive({
  selector: '[simpleTimer]'
})
export class SimpleTimer {

  running: boolean = false;
  time: number = 0;

  constructor(private templateRef: TemplateRef,
              private viewContainer: ViewContainerRef,
              private cdr: ChangeDetectorRef) {}

  ngOnInit() {
    // we need to detach the change detector initially, to prevent a
    // "changed after checked" error.
    this.cdr.detach();
  }

  ngAfterViewInit() {
    let view = this.viewContainer.createEmbeddedView(this.templateRef);
    let api = {
      toggle: () => this.toggle(),
      reset: () => this.reset(),
      getTime: () => this.getTime()
    }
    view.setLocal('timerApi', api);

    setTimeout(() => this.cdr.reattach());
  }

  getTime() {
    let pad = n => n <= 9 ? '0' + n : n;
    let cs = Math.floor(this.time % 100);
    let s = Math.floor((this.time / 100) % 60);
    let m = Math.floor(this.time / 6000);
    return `${pad(m)}:${pad(s)}:${pad(cs)}`;
  }

  tick = () => {
    this.time += 1;
    if (this.running) {
      setTimeout(this.tick, 10);
    }
  };

  toggle() {
    this.running = !this.running;
    if (this.running) {
      this.tick();
    }
  }

  reset() {
    this.time = 0;
  }
}
And here is the working demo on Plunker.
Conclusion
If you are building apps right now with Angular 2, you have taken on the challenge of getting productive with a young and sparsely-documented technology. Figuring all this out took me a couple of days of wading through source code and scouring the web for any helpful information (of which there is very little at this time). It may be that there are issues with or improvements to be made with my approach - more knowledgeable Angular 2 devs please speak up!
To see this technique in “production”, take a look at my pagination module ng2-pagination.
Here are some more resources on the topic of templates in Angular 2 which I found useful in my research: