If you are building a public-facing app in AngularJS, you’ll want your users to be able to share it via social media. Indeed, for certain apps, this may be the most important channel of promotion. By “rich social sharing”, I mean something like this:

Rich sharing on Facebook
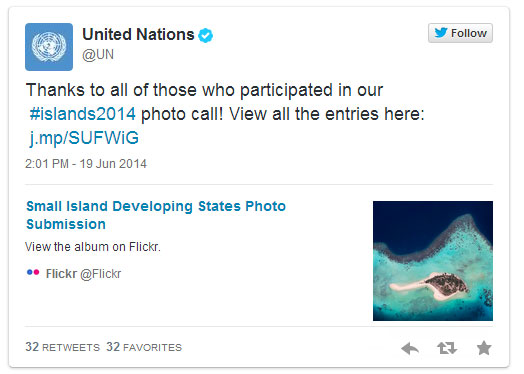
Rich sharing on Twitter
As you can see, certain sites allow Facebook, Twitter et al. to fetch more than just the standard page title and image. This is achieved by using special meta tags in the HTML head. For example, Facebook and a bunch of other sites like Pinterest and Google Plus can read the Open Graph protocol, which looks something like this:
<head>
    <meta property="og:title" content="My Page" />
    <meta property="og:description" content="A description of my page." />
    <meta property="og:image" content="http://www.mysite.com/images/my_lovely_face.jpg" />
    <!-- etc. -->
</head>
Twitter uses a very similar system, but with a prefix of “twitter:” rather than “og:”.
When you share a URL on one of these sites, a crawler is dispatched to that URL and will scrape the page’s HTML, firstly looking for any of these special meta tags that it can understand and use, and secondly looking at the regular HTML elements such as the tag and the any images that it might be able to use.
The Problem With AngularJS
I have built a simple AngularJS app to show off my favourite albums, and I’ll use it as the example for this article. If I wanted to share one of my favourite albums with my Facebook friends, I’d paste the link into the status update box and hope to see something like this:

The desired sharing experience
However, even though I have included all the necessary Open Graph meta tags, when I paste my link, I will be disappointed to see something more like this:

The ugly reality
The reason it looks so bad is simple: the crawlers that scrape the HTML do not evaluate JavaScript. Therefore, when they crawl my app, this is what they will see:
<head>
    <meta property="og:title" content="{{ page.title }}" />
    <meta property="og:description" content="{{ page.description }}" />
    <meta property="og:image" content="{{ page.image }}" />
    <!-- etc. -->
</head>
This problem would apply to any client-side JavaScript framework. I’m just concentrating on Angular since that is what I know, and I have implemented the following solution to good effect in a production AngularJS app.
The Solution
The solution is basically to use some kind of server-side user-agent detection to pick up whenever a social media crawler arrives, and then instead of showing it the plain AngularJS template file, redirect it to a server-generated page that will contain the desired meta tags, all filled with the correct information. This is the basic idea in visual form:

Workflow of server-side rendering
What we will need:
- A web server capable of URL rewriting (or, more accurately, remapping). In this case, we are using Apache and the mod_rewrite module.
- A server-side language to generate our crawler-friendly pages. In this case I will use PHP.
- The Angular app must be using “html5mode” its URLs. This is because the # portion of a URL does not get sent to the server, so makes server-side redirection based on the Angular page impossible. For more information, see this StackOverflow answer.
Following is a write-up of how to set things up assuming the above technologies are being used.
Configure Apache
We will need three specific Apache modules enabled: mod_rewrite, mod_proxy and mod_proxy_http (installation of these modules will vary depending on your OS/Apache version, but is beyond the scope of this article). We will come back to the use of these modules shortly.
Set up the server-side script
Next we need to make the script that will handle the requests from the social media crawlers. Let’s assume that our AngularJS app gets its data from an API. In this example, we are getting album information from the endpoint api/{id}. We can re-use this same API in our server-side script and use the data to build, on the server, our HTML page including all the social media meta tags, and output this HTML to the crawler.
An simplified PHP implementation follows:
<?php
$SITE_ROOT = "http://www.mysite.com/";

$jsonData = getData($SITE_ROOT);
makePage($jsonData, $SITE_ROOT);
function getData($siteRoot) {
    $id = ctype_digit($_GET['id']) ? $_GET['id'] : 1;
    $rawData = file_get_contents($siteRoot.'api/'.$id);
    return json_decode($rawData);
}

function makePage($data, $siteRoot) {
    ?>
    <!DOCTYPE html>
    <html>
        <head>
            <meta property="og:title" content="<?php echo $data->title; ?>" />
            <meta property="og:description" content="<?php echo $data->description; ?>" />
            <meta property="og:image" content="<?php echo $data->image; ?>" />
            <!-- etc. -->
        </head>
        <body>
            <p><?php echo $data->description; ?></p>
            <img src="<?php echo $imageUrl; ?>">
        </body>
    </html>
    <?php
}
?>
The output of this script can be tested by visiting it directly in the browser. In the example, that would be http://www.michaelbromley.co.uk/experiments/angular-social-demo/server/static-page.php?id=1
Redirect crawlers to the server-side script
Now that we have our server-side script up an running, we just need to set up the redirection. This technique requires the use of the three Apache modules mentioned earlier, and is done with an .htaccess file containing the following rule:
<ifModule mod_rewrite.c>
RewriteEngine On

# allow social media crawlers to work by redirecting them to a server-rendered static version on the page
RewriteCond %{HTTP_USER_AGENT} (facebookexternalhit/[0-9]|Twitterbot|Pinterest|Google.*snippet)
RewriteRule album/(\d*)$ http://www.michaelbromley.co.uk/experiments/angular-social-demo/server/static-page.php?id=$1 [P]

</ifModule>
The RewriteCond link looks at the user agent string to see if it matches the following expression. The specific strings used in this expression are based on the known user agents of the various social media crawlers (at the time of this writing):
- Facebook: facebookexternalhit/1.1 (+http(s)://www.facebook.com/externalhit_uatext.php)
- Twitter: Twitterbot/{version}
- Pinterest: Pinterest/0.1 +http://pinterest.com/
- Google Plus: Google (+https://developers.google.com/+/web/snippet/)
- Google Structured Data Testing tool: Google-StructuredDataTestingTool; +http://www.google.com/webmasters/tools/richsnippets
The [P] flag causes Apache to perform a remap using mod_proxy and mod_proxy_http, rather than a regular redirect. If a 301 redirect is used, Facebook for example will link to the “static-page.php” URL rather than the original URL. Disclaimer: I am no Apache expert - in fact I find .htaccess and URL rewriting to be one of the toughest things to get right - so there may be other, better ways to do this. However, after much trial on my part, this is the configuration that I found to work.
Test it out
Now that everything is set up, it’s time to test out whether it actually works as expected. All the social media sites we have mentioned so far offer some kind of validation tool that will give you an idea of what your URL will look like when shared:
Also, Fiddler is a great tool for testing out this kind of thing, since you can manually set the user agent and then inspect the response from the server.
Other Approaches
The solution I described here is perhaps the most basic approach to solving this issue. The problem with crawlers and JavaScript apps is much bigger than this, and another approach would be to use a more complete solution such as Prerender.io to apply this same principle (in a more sophisticated form) to your entire app. The advantage with this would be that you will also cover search engine crawlers (although recently Google announced that it would start to evaluate JavaScript, largely mitigating the issue for that particular search engine), and you needn’t manually build the server-side pages. The drawback is just a bit more overhead to set up and maybe a more complex a workflow to build your app.
As with Google, it is conceivable that the various social media sites may modify their crawlers to evaluate JavaScript too, in which case the method I outline here can be consigned to history as just another hack to patch up the developing Internet.
Until that time, if you want your AngularJS app (or any client-side JavaScript app) to work at all with Facebook, Twitter, Pinterest et al., I hope you can use some of the ideas I have presented here.
Resources
Demo App - Try sharing it. It should work!
GitHub Repo - Contains full code for the app so you can see in more detail how this solution works.
Postscript - Readers' Notes
When this post was written, I had a comments system on the blog. A few readers added some tips for other environments which may be of use.
I include them here as-is, I cannot vouch for their correctness:
Nginx
Callum Hopkins writes: Got it to work in Nginx:
rewrite /([A-Za-z]+)/ /static/static-page.php?id=$1 last;
proxy_pass http://domain.com;
Have those lines inside the $http_user_agent condition block. The proxy means the js url shows the static url’s content but keeps the js url and doesn’t flag up errors on the social media cards. I tested this on FB’s Open Graph Object Debugger and worked fine.
Tom McDevitt writes: Michael, thank you so much for sharing. This was a big help for me. If it’s any help, I used the following nginx configuration for my angular webapp https://dofunstuff.com. The web application is behind a proxy server at /app/ and any requests from the facebook robot are sent to /app/robots/. The site has html 5 mode enabled and this config allowed me to perform page refreshes.
location / {
  try_files $uri$args $uri$args/ /index.html;

  if ($http_user_agent ~ facebookexternalhit|Facebot|Twitterbot|Pinterest|Google.*snippet) {
    # Send request to robots api
    proxy_pass http://localhost:8080/app/robots$uri$args;
  }
}

location /app {
  proxy_pass http://localhost:8080;
}
Elastic Beanstalk / Tomcat
Captain Crunch writes: This article was a life saver! I spent the last two days trying to learn to do this on Elastic Beanstalk running Tomcat, but instead of using .htaccess I had to modify the configuration for httpd directly. If anyone is looking to do this in Elastic Beanstalk/Tomcat, this is what I did to get it working:
- httpd in EB/EC2 uses virtual hosting, so you need to place Michael’s RewriteRule within a VirtualHost block in one of the config files located at
/etc/httpd/conf.d/elasticbeanstalk. You can do this by creating a .ebextensions directory in the root directory of your project and placing a .conf YAML file there that will create a temp file somewhere and then copy that file over to/etc/httpd/conf.d/elasticbeanstalkwith a container command. - As a shortcut to step 1), you can just create an
/httpd/conf.d/elasticbeanstalkpath in your .ebextensions directory and overriding Elastic Beanstalk’s 00_application.conf file with your own 00_application.conf file:
http://docs.aws.amazon.com/elasticbeanstalk/latest/dg/java-tomcat-platform.html
Just place the RewriteRule in your 00_application.conf file and when you upload your WAR, AWS will automatically extract your .ebextensions/httpd/conf.d/elasticbeanstalk/00_application.conf file and replace the 00_application.conf file in /etc/httpd/conf.d/elasticbeanstalk with it. Here’s my 00_application.conf file that got redirect working for me. Instead of <ifmodule mod_rewrite.c=""> I used the LoadModule to make sure mod_rewrite was running:
<virtualhost *:80="">

LoadModule rewrite_module modules/mod_rewrite.so

RewriteEngine On
# allow social media crawlers to work by redirecting them to a server-rendered static version of the page
RewriteCond %{HTTP_USER_AGENT} (facebookexternalhit/[0-9]|Twitterbot|Pinterest|Google.*snippet)
RewriteRule album/(\d*)$ http://www.michaelbromley.c... [P]

<proxy *="">
Order Allow,Deny
Allow from all
</proxy>
ProxyPass / http://localhost:8080/ retry=0
ProxyPassReverse / http://localhost:8080/
ProxyPreserveHost on

ErrorLog /var/log/httpd/elasticbeanstalk-error_log
</virtualhost>
Hopefully this saves someone a lot of time trying to get this working in AWS.